Tomatoes are one of the most flavorful and versatile crops you can grow, and starting them from seed indoors gives you complete control over the varieties you choose. When you grow from seed, you’re not limited to whatever the local garden center happens to stock. You can explore thousands of varieties with unique flavors, colors, and textures.
There’s absolutely nothing wrong with buying tomato starts. Many gardeners do it every year, especially when making last-minute planting decisions. The downside is that commercial growers select varieties based on shipping durability, uniform growth, and disease resistance — not necessarily on taste.
Growing tomatoes from seed opens up a much wider world. With thousands of varieties available worldwide, you can grow heirlooms, specialty cherries, paste tomatoes, and unique slicers that you’ll never see in stores.
Tomatoes are naturally eager to grow. Seeds germinate readily when given warmth and moisture. If you create the right indoor environment, success rates are very high.
Let’s walk through the process step by step.
Step 1: Choose Your Seeds
One of the first decisions is whether you want indeterminate or determinate tomatoes.
Indeterminate tomatoes grow continuously throughout the season until frost or disease stops them. They flower and produce fruit steadily from midsummer onward. These plants can grow extremely tall in good conditions — sometimes well over 10 feet — and require strong support and space.
Determinate tomatoes grow to a set height and produce most of their fruit in a shorter window. They’re ideal for gardeners who want a compact plant or who plan to preserve large batches at once, such as making sauce from Roma tomatoes.
Both cherry and standard slicing tomatoes come in indeterminate and determinate types.
Seeds are widely available through online seed companies, specialty tomato growers, and even large retail stores during spring.
Step 2: Gather Your Supplies
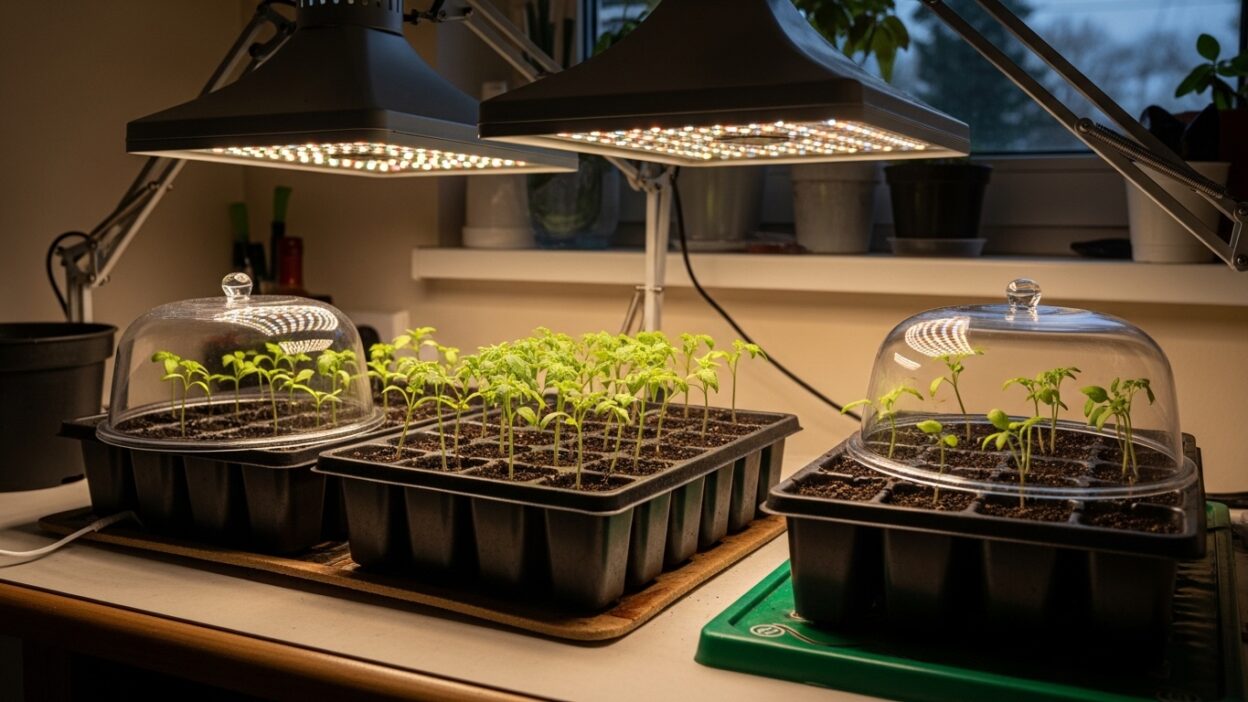
Starting tomatoes indoors requires a few basic tools.
Grow lights: Full-spectrum LED grow lights work best. They should be adjustable so you can raise them as plants grow. Strong light prevents leggy seedlings.
Timer: Seedlings need about 16 hours of bright light daily once sprouted. A simple 24-hour timer makes this easy.
Heat mat: Indoor spring temperatures are often too cool for ideal germination. A heat mat keeps soil about 10°F warmer than room temperature and dramatically improves sprouting success.
Seed starting trays with domes: Domed trays maintain warmth and humidity, helping seeds germinate faster. Smaller trays also make it easier to label individual cells.
Labels: If growing multiple varieties, label each cell clearly.
Small 4-inch pots: Seedlings will need to be transplanted into larger pots before going outdoors. This allows them to grow stronger stems and root systems.
Seed starting mix: A light seed starting mix or quality potting mix works well. There’s no need to overcomplicate this — most commercial mixes perform fine.
Step 3: Sow the Seeds
Fill your seed trays with soil, leaving about ¼ inch at the top.
You can plant:
-
Two seeds per cell if you only need a few plants (you’ll thin later), or
-
One seed per cell if growing larger quantities.
Plant seeds ¼ to ½ inch deep. Cover lightly and gently firm the soil. Water thoroughly with a gentle stream.
Place trays on the heat mat and cover with domes if using them.
As soon as sprouts appear — often looking like tiny loops pushing through the soil — position grow lights about 3–4 inches above the seedlings and set the timer for 16 hours per day.
Keep the heat mat running continuously.
Step 4: Care for Seedlings
If two seeds sprout in one cell, remove the weaker seedling so each plant has room to grow.
Keep soil consistently moist but never soggy. Check daily to ensure it doesn’t dry out, especially once domes are removed.
Adjust grow lights frequently so they remain 2–3 inches above the tops of the plants. This close positioning prevents stretching and helps produce sturdy stems.
Step 5: First Transplant
When seedlings reach about 4–5 inches tall, transplant them into small pots.
Tomatoes have a unique trait: they grow roots along buried stems. By transplanting into deeper pots and burying part of the stem, you encourage a stronger root system.
Gently remove seedlings, place them into fresh potting mix in 4-inch pots, and bury them deeper than before. Water thoroughly and return them under grow lights.
At this stage, growth accelerates quickly, so continue adjusting lights upward as needed.
Step 6: Hardening Off
Tomatoes are sensitive to cold. Keep them indoors until nighttime temperatures consistently stay in the upper 50s°F.
Before planting outside, gradually acclimate plants to outdoor conditions in a process called hardening off.
Start by placing them outside in shade for a few hours each morning for several days. Then slowly introduce them to direct sunlight for increasing periods each day.
After several days of gradual exposure, and once overnight temperatures are stable, plants are ready for the garden.
Final Thoughts
Starting tomatoes from seed requires a bit of early spring effort, but the payoff is enormous. You gain access to extraordinary varieties and produce strong, healthy plants tailored to your growing space.
With warmth, consistent moisture, good lighting, and a careful transplant schedule, you’ll soon have vigorous plants ready to produce a summer harvest of delicious, homegrown tomatoes.